In Rhino 4, surface and polysurface objects can be set to show their U and V directions by applying a new or modified display mode to a viewport or to individual objects using SetObjectDisplayMode.

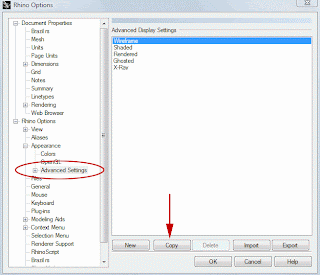
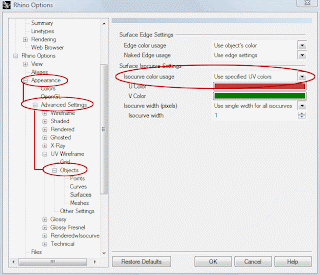
 To make a new wireframe display that shows U and V directions, open Options > Appearance > Advanced Settings. In the list of display modes, select WireFrame and click the Copy button near the bottom of the page. The current Wireframe display mode will be duplicated and you will see the controls for this new mode. You may want to rename it from the default 'Copy of Wireframe'. In the 'tree' view of the display mode controls on the left, choose Objects, then Surfaces. On the Surfaces page look for 'Surface Isocurve Settings' The default setting here is 'Use object's color' but the drop down list includes 'Use Specified UV colors'. Selecting this option will change the control to show color swatches for U and V - click on the swatches to access the color picker dialog to set the colors you like. Other display modes that show surface isocurves can be changed using this same setting in that display mode's controls.
Make any other changes you like in the display mode and exit Options. The new display mode will show up in the viewport title context menus by default so that the viewport can be changed as a whole to this display mode, and it will be available to the SetObjectDisplayMode command, which sets selected objects' display modes in the active viewport. You can save custom display modes from the Options > Appearance > Advanced Display page by selecting it from the list and clicking the Export button.